Mobile users may find this LINK to GoogleDocs easier to use.

Images from the article can also be found below for a closer look
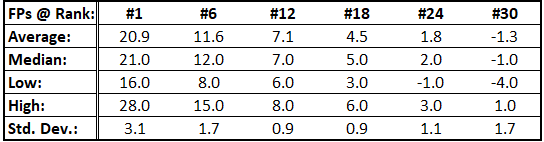
Charts

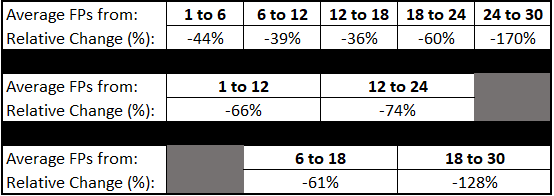
Chart 1 (D)
Chart 2 (D)
Chart 3 (D)
Chart 4 (D)

Graphs

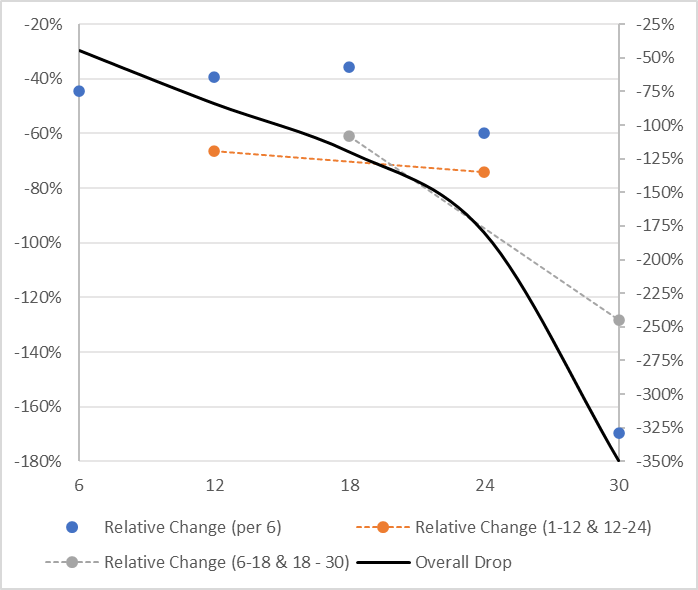
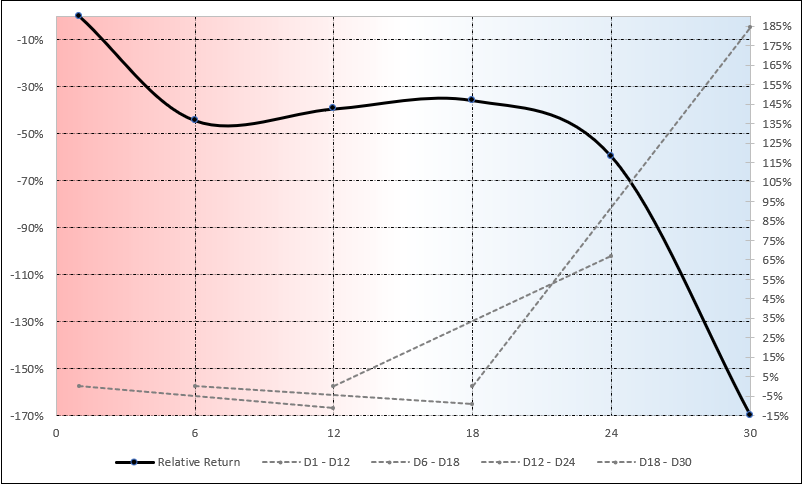
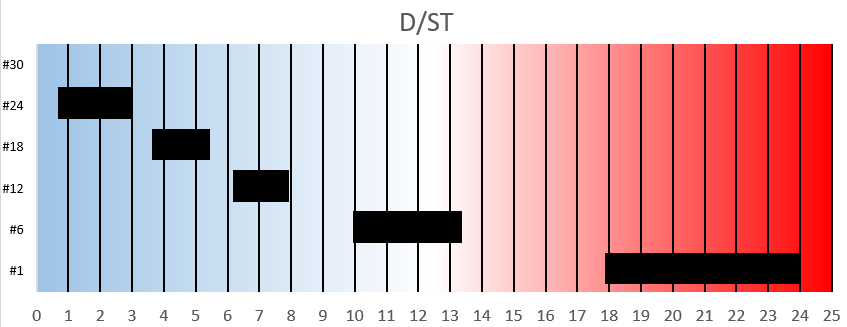
Graph 2.1 (D)
Graph 2.2 (D)
Graph 2.3 (D)
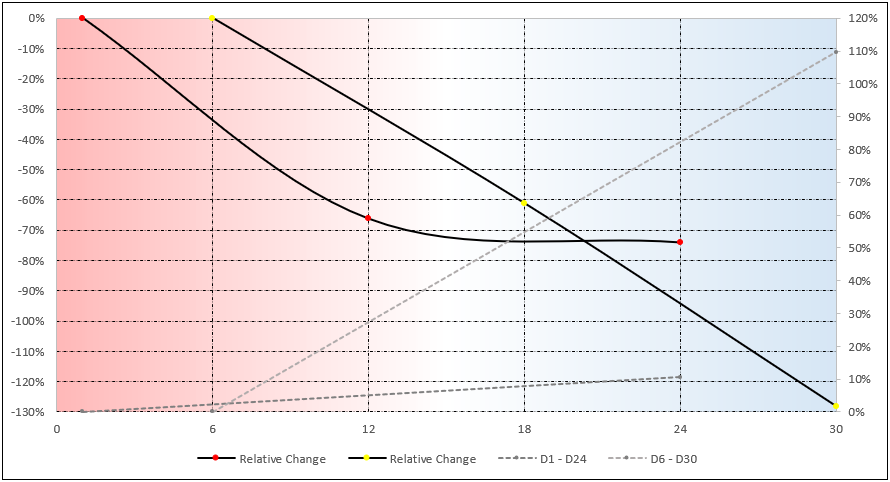
Graph 3.1 (D)

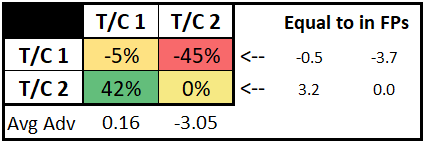
Matrices

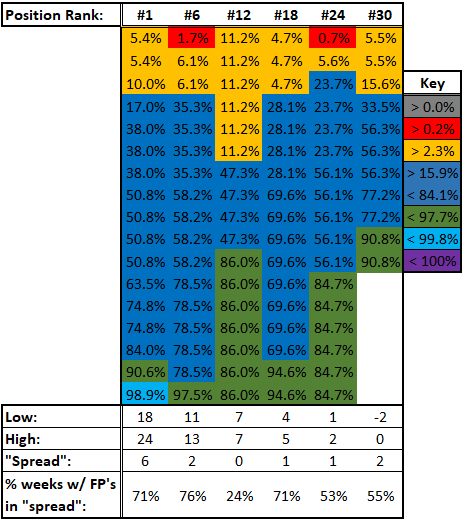
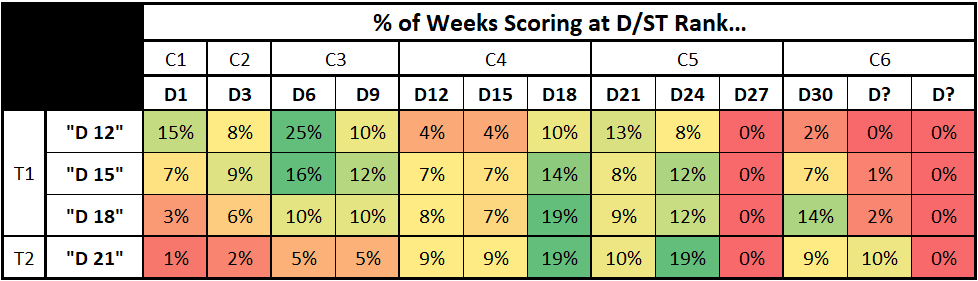
Matrix 1.1 (D)
Matrix 1.2 (D)
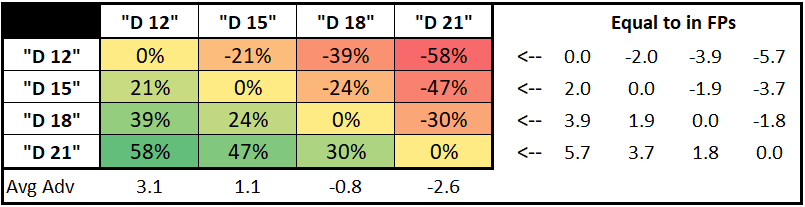
Matrix 2.1 (D)
Matrix 2.2 (D)