Mobile users may find this LINK to GoogleDocs easier to use.

Images from the article can also be found below for a closer look

Charts

Chart 1 WR (Half PPR)
Chart 2 WR (Half PPR)
Chart 3 WR (Half PPR)
Chart 4 WR (Half PPR)

Graphs

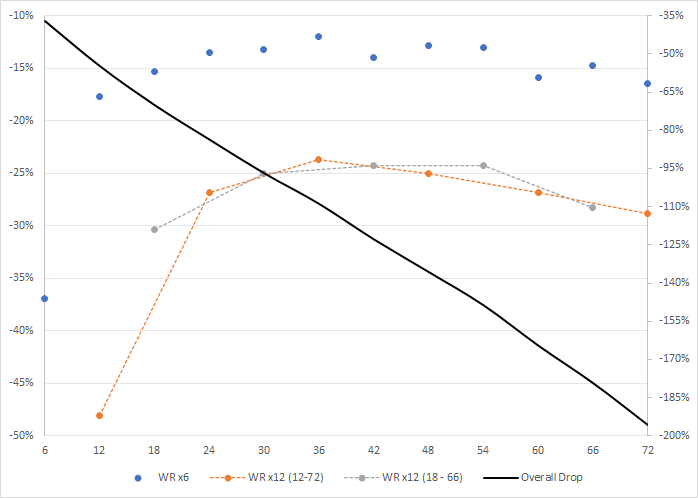
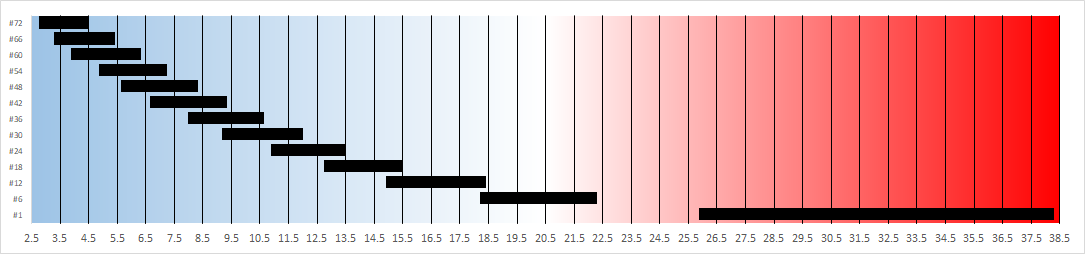
Graph 2.1 (Half WR)
Graph 2.2 (Half WR)
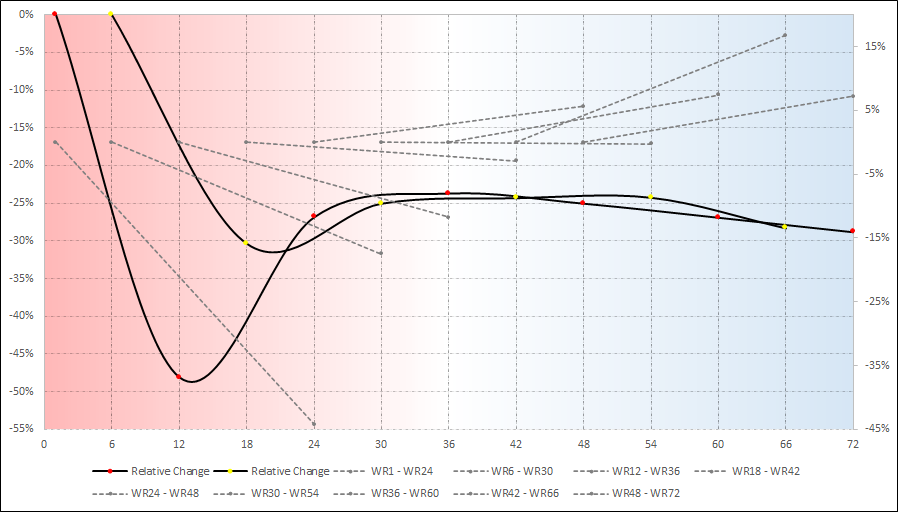
Graph 2.3 (Half WR)
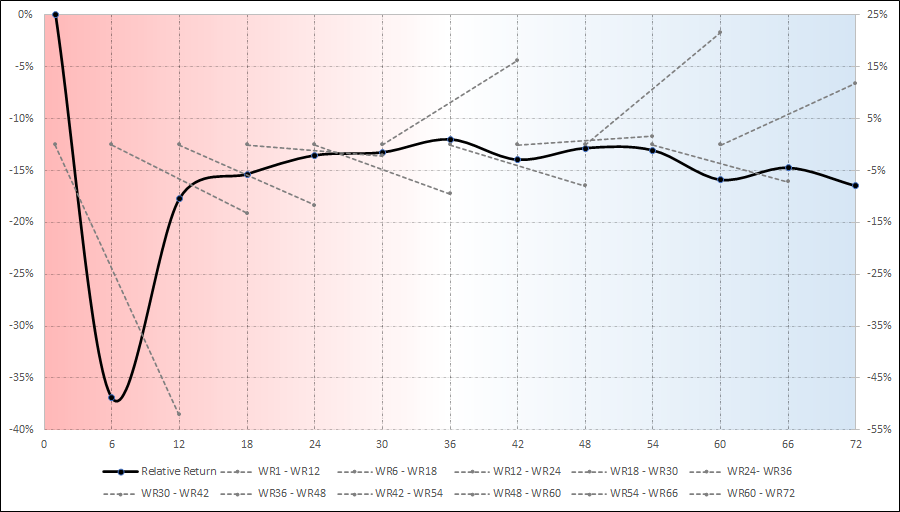
Graph 3.1 (Half WR)

Matrices

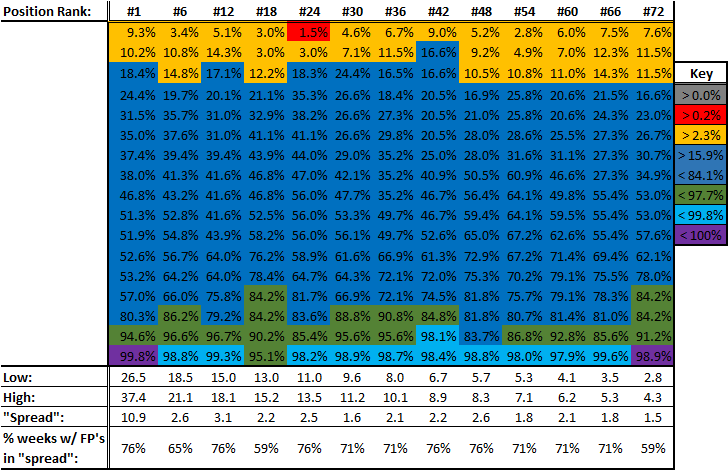
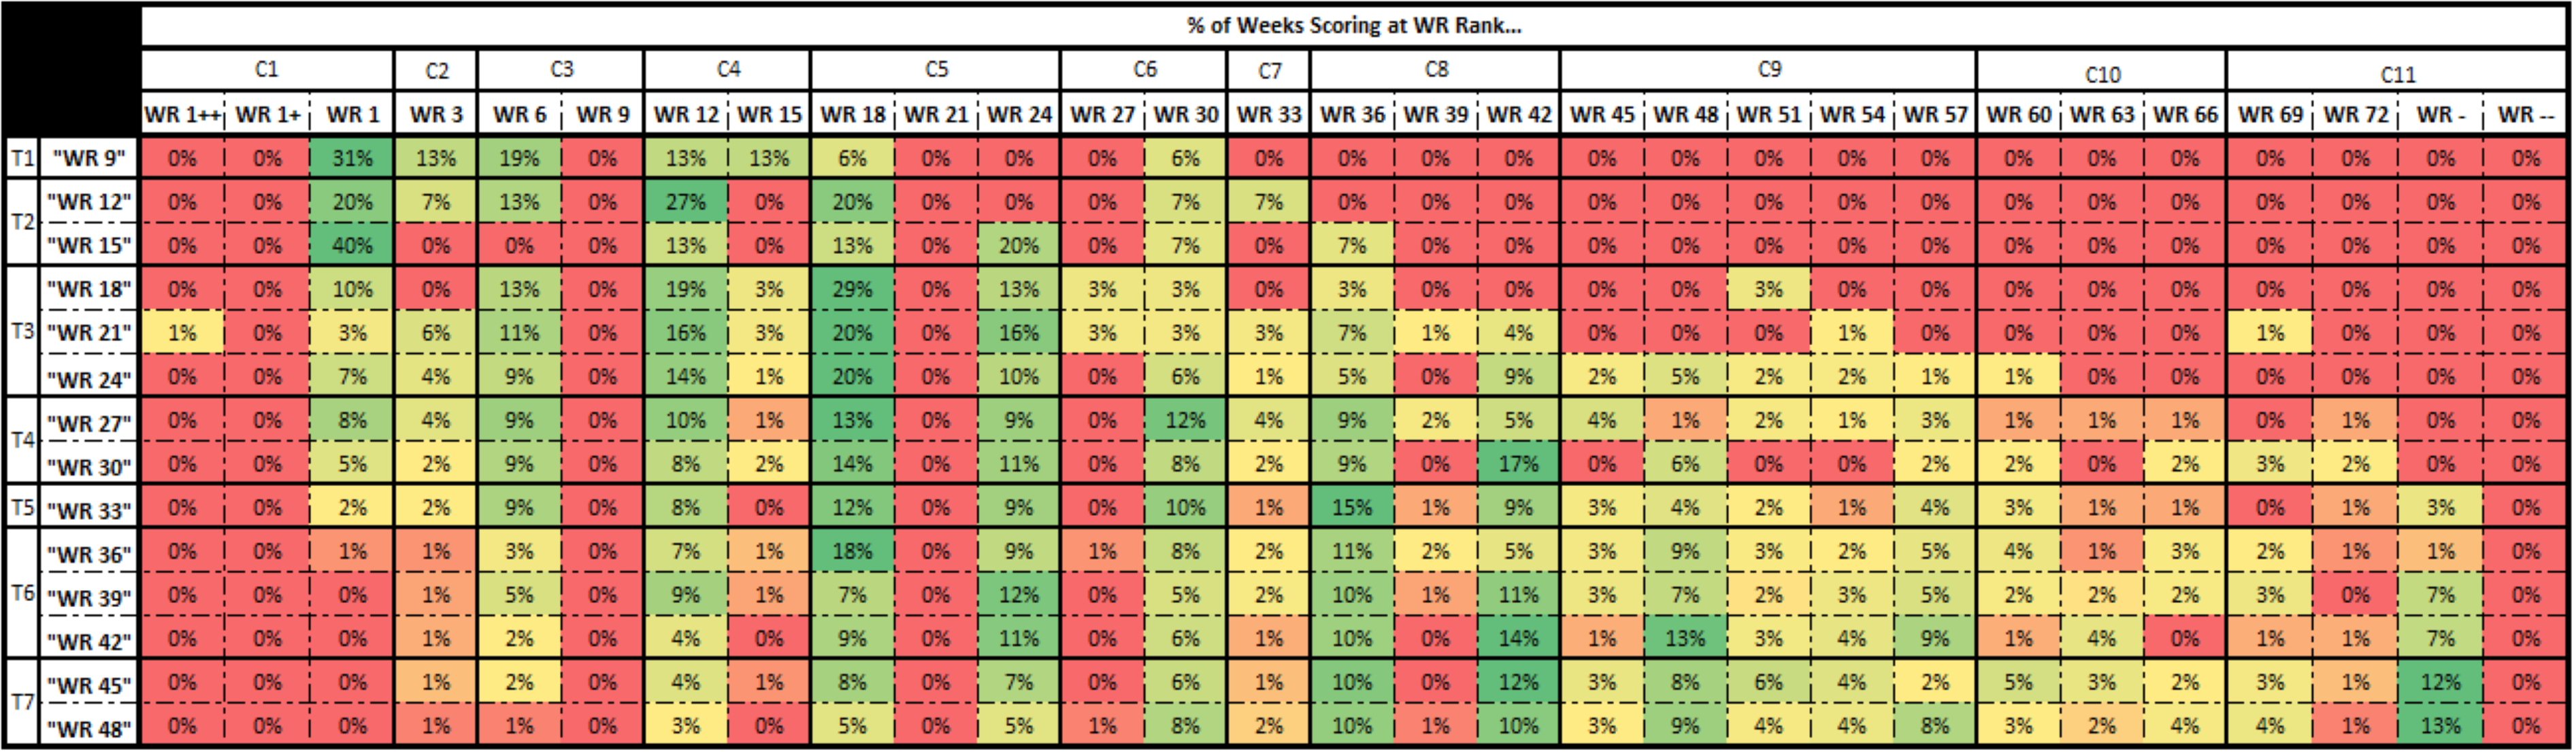
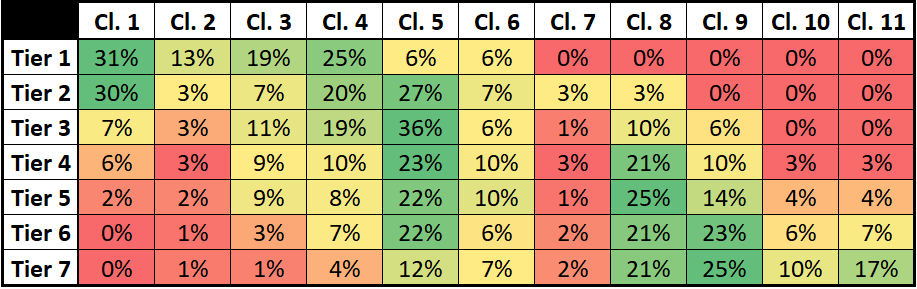
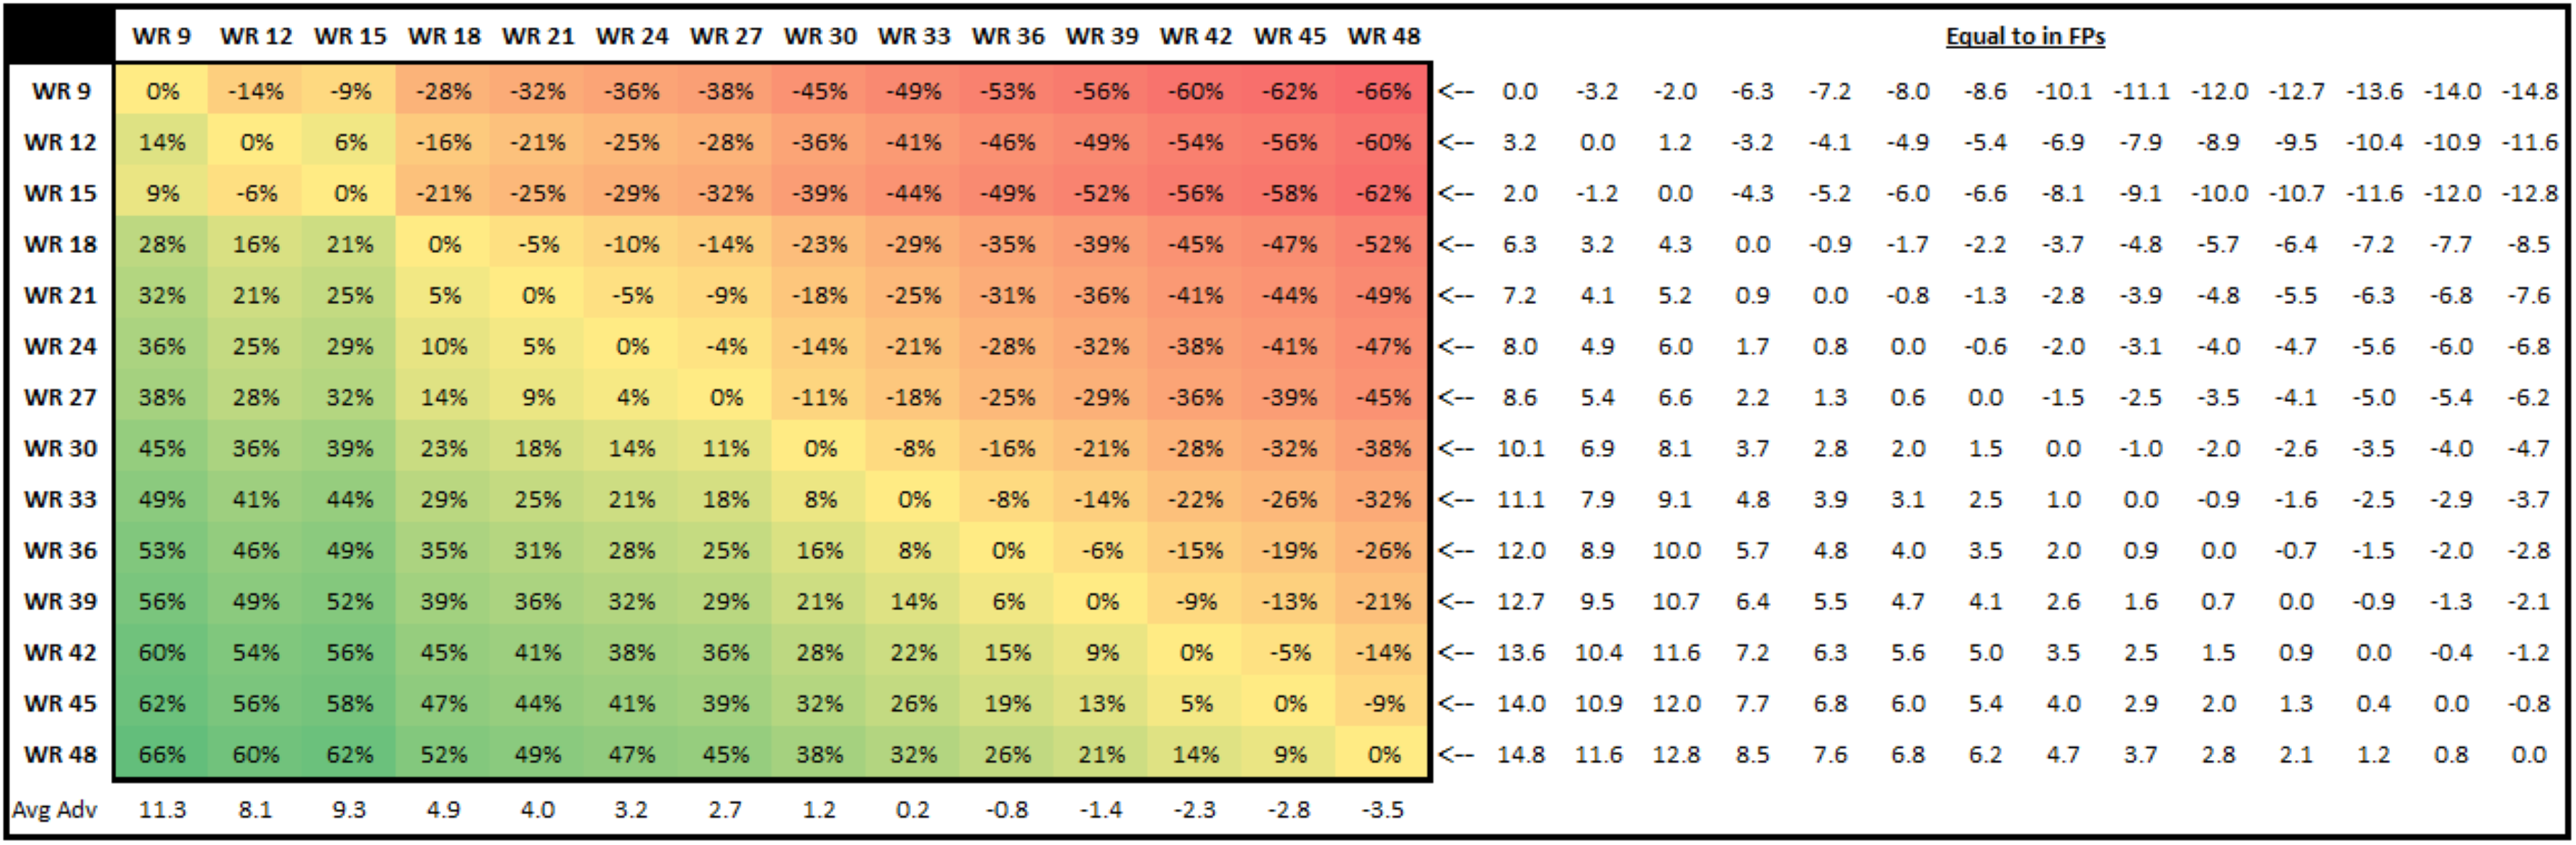
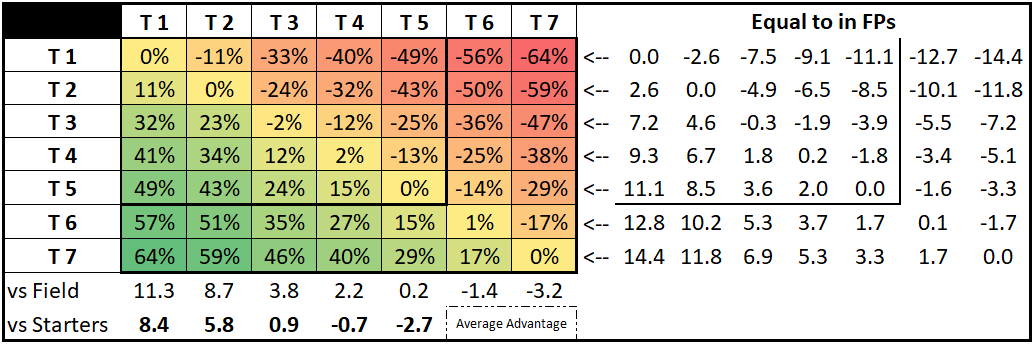
Matrix 1.1 (WR Half PPR)
Matrix 1.2 (WR Half PPR)
Matrix 2.1 (WR Half PPR)
Matrix 2.2 (WR Half PPR)